
How to Make Clear Ice Cubes at Home
Jump to:
Get ready to shake up your cocktail game, because we’re here to spill the secrets on how to make clear ice like a pro mixologist. Say goodbye to cloudy cubes and hello to the hippest, clearest cubes in town.
Clear ice is the crown jewel of mixology magic. It’s the kind of drink addition that makes you go, “Whoa, what’s the secret behind this translucent masterpiece?” Well, fear not, dear reader, for we are about to reveal the secrets that will have you creating picture-perfect transparent cubes that would make even the most discerning cocktail aficionado swoon.
How to make clear ice cubes in a tray
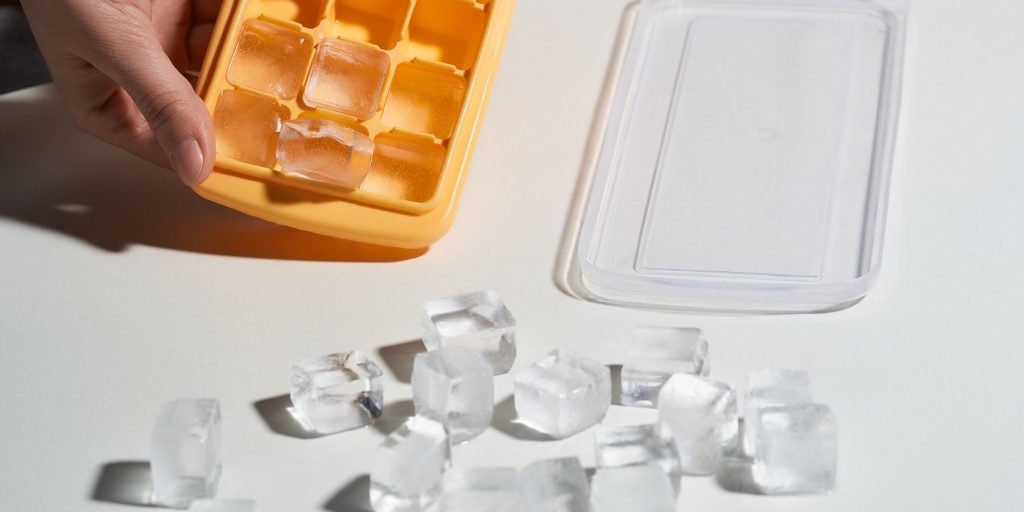
It may seem like a tricky process, but you simply need to follow the steps. Once you’ve done it once or twice, making clear ice at home will seem much easier than you imagined.
Step 1: Fill the bottom tray
- Start by selecting a silicone tray with a removable bottom. These trays are ideal for creating clear ice cubes due to their flexibility and the ease of removing the ice cubes.
- Place the silicone tray on a flat surface to ensure stability during the process.
- Use filtered or distilled water to fill the bottom tray of the siliconetray. The quality of water plays a significant role in achieving clear cubes by minimising impurities.
- Fill the tray just below the rim to allow for expansion as the water freezes. Avoid overfilling, as it may lead to messy spills or misshapen cubes.
Step 2: Create insulation
- After filling the bottom tray, lay a piece of insulating material, like a kitchen towel, over the top. This insulation helps slow down the freezing process and encourages the formation of clear ice.
- Gently press the insulating material down, making sure it covers the entire surface of the water-filled tray.
Step 3: Freeze and remove ice cubes
- Carefully transfer the tray to the freezer, ensuring it remains level to prevent water from spilling.
- Allow the tray to freeze completely. The time required may vary depending on the size of the cubes and the temperature of your freezer. Generally, it takes about 4 to 6 hours for the cubes to freeze.
- Once fully frozen, remove the tray from the freezer and let it sit at room temperature for a few minutes. This helps loosen the cubes and makes them easier to remove.
- Gently twist or flex the silicone tray to release the clear cubes. If they resist, you can briefly run the bottom of the tray under lukewarm water to loosen them.
- Your clear cubes are now ready to take centre stage in your perfectly crafted cocktails. Cheers!
Learn more: Make These On the Rocks Cocktails Like a Pro
Making clear ice cubes in a cooler
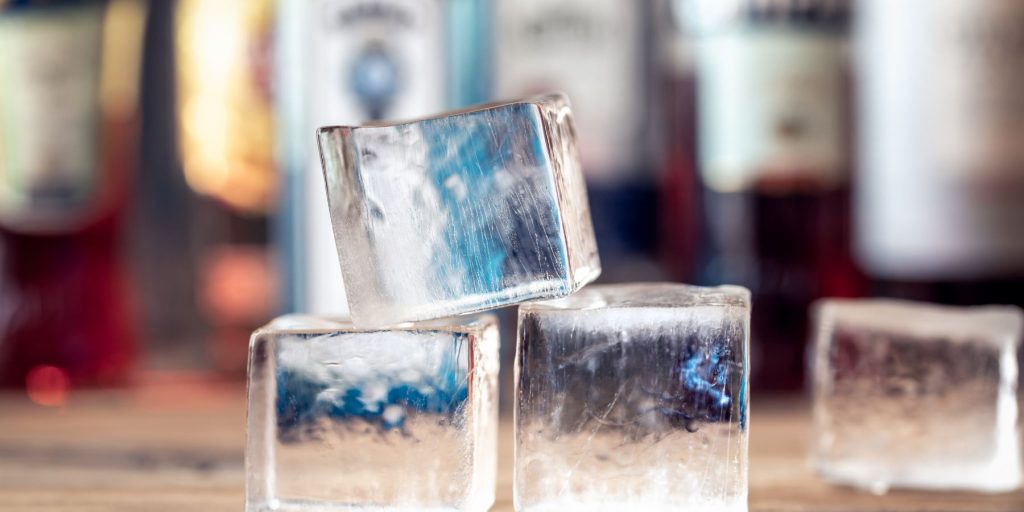
You can also make clear ice cubes in a cooler, and hand-carve it if you prefer to get crafty. Here are the steps to follow if you would prefer to go this route:
Step 1: Freeze warm water in a cooler for 18-24 hours
- Choose a clean and insulated cooler that can accommodate the desired size of block you wish to create.
- Fill the cooler with warm water from the tap, ensuring it’s not boiling hot to avoid damaging the cooler.
- Place the filled cooler in the freezer with the lid slightly open to allow for air circulation. Freezing warm water helps minimise impurities and air bubbles, resulting in clearer ice.
- Leave the cooler undisturbed in the freezer for approximately 18 to 24 hours to ensure the water freezes completely.
Step 2: Extract and carve the ice block
- After the designated freezing time, remove the cooler from the freezer and let it sit at room temperature for a few minutes to loosen the block.
- Carefully remove the block from the cooler, taking caution not to damage it during the extraction process.
- Place the block on a clean and stable surface, preferably a cutting board or a workbench.
- Use a serrated knife or ice saw to carve the block into desired shapes, such as large cubes, spheres, or custom shapes. Rinse the block under cold water occasionally during carving to remove any shavings and improve clarity.
- Once shaped, rinse the carved pieces under cold water to remove any remaining impurities or ice particles. Pat them dry gently with a clean cloth or paper towel.
Read next: Freezer Door Cocktails for Easy Hosting
Extra tips for making & shaping clear ice

Here are some extra tips to take your clear ice game to the next level:
Use filtered or distilled water. This helps minimise impurities and enhances the clarity of your cubes. Tap water can contain minerals and chemicals that contribute to cloudy ice.
Freeze in layers. To create clear blocks with distinct layers, freeze the water in stages. Fill a container partially, let it freeze, and then add another layer of water on top. Repeat this process until the desired thickness is achieved.
Shape your ice. Clear ice can be shaped into various forms, such as spheres, cubes, or even custom shapes. Using moulds or carving tools, you can create impressive sculptures or unique cubes that add flair to your cocktails.
Remember, practice makes perfect! Experiment with different techniques and have fun while honing your clear ice-making skills.
Do you add ice before or after building a drink?
Cocktails we love to serve with clear ice
Clear ice not only enhances the visual appeal of cocktails but also elevates the overall drinking experience. Here are a few cocktails that are made even better when paired with the beauty of clear ice:
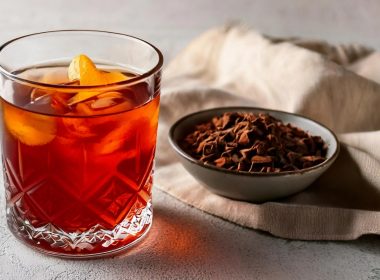
Old Fashioned
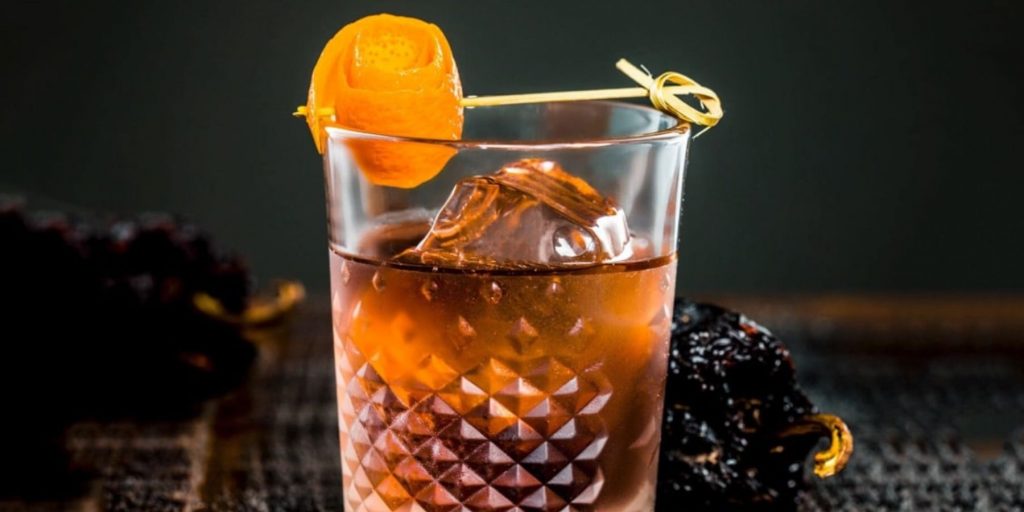
This classic Old Fashioned cocktail is perfect for clear cubes. The clarity of the ice accentuates the rich amber colour of the whisky, making it a true showstopper.
Mint Julep

Traditionally served in a silver cup, the Mint Julep takes on an extra touch of elegance when accompanied by a clear cone or large cube. The slow melting of the ice keeps the drink icy cold while enhancing its minty freshness.
Mojito
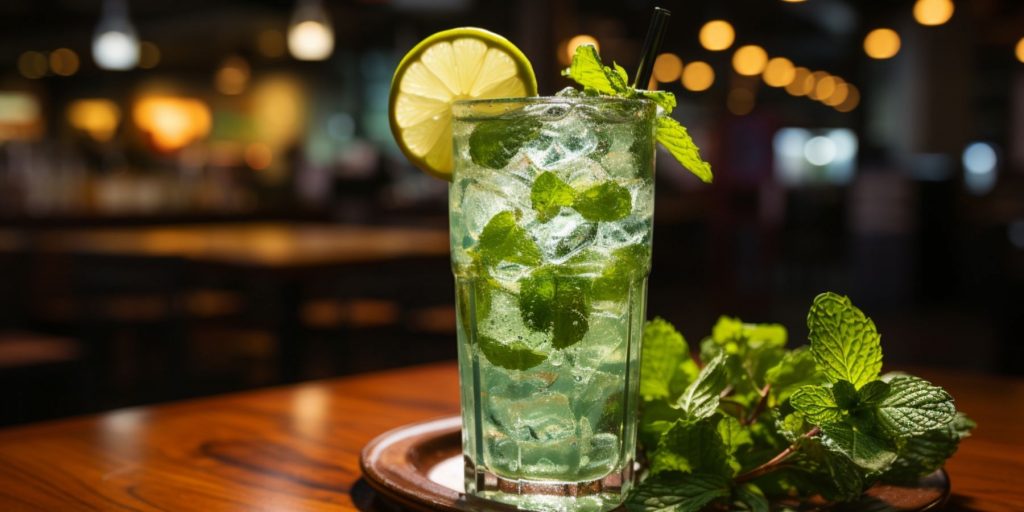
The combination of muddled mint, lime, and rum in a Mojito is a match made in heaven. Pair it with a clear cube, and you have a visually stunning cocktail that’s as refreshing as it looks.
Lime Margarita
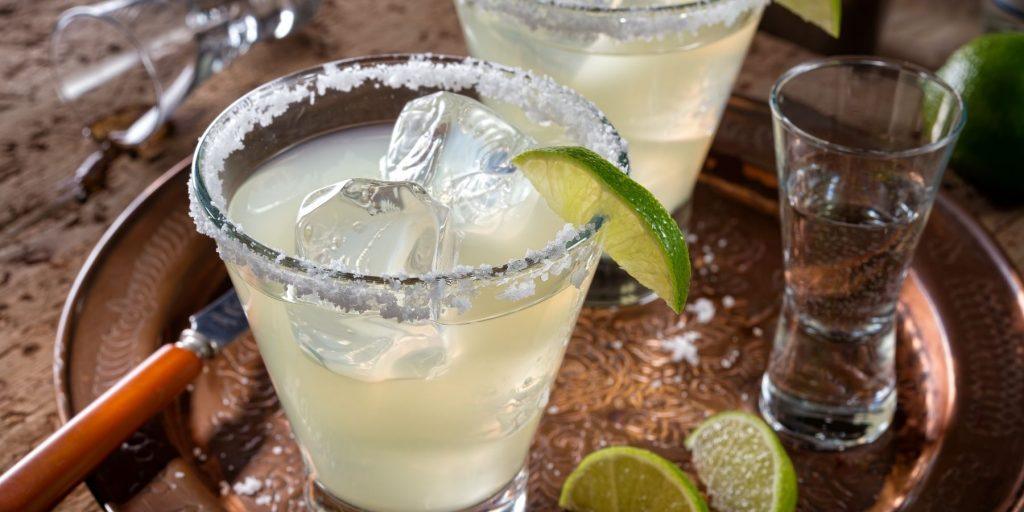
Indulge in the vibrant flavours of a Lime Margarita, elevated to new heights with the addition of clear ice. The crystal-clear appearance of the ice showcases the zesty lime hue of the cocktail, enhancing its visual appeal while keeping your drink chilled to perfection.
Sea Breeze
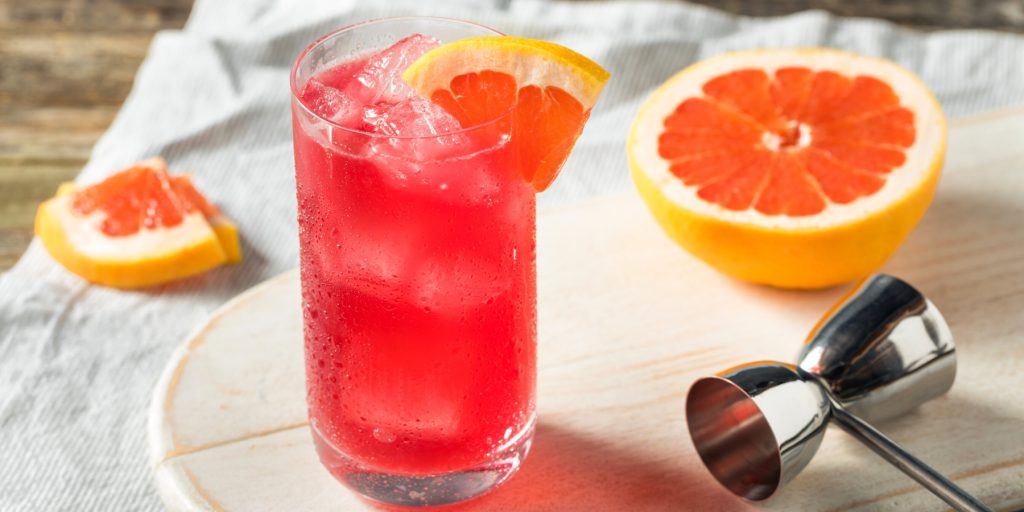
Transport yourself to a beachside paradise with a Sea Breeze cocktail served over clear ice. The pristine clarity of the ice brings out the mesmerising combination of cranberry, grapefruit, and vodka, creating a captivating blend that is as invigorating to the eyes as it is to the taste buds.
Moscow Mule

Sip on a Moscow Mule that dazzles both in taste and presentation when enjoyed with clear ice. The transparent cubes accentuate the fiery golden hue of the ginger beer and the captivating taste of the vodka, adding an element of sophistication to this classic cocktail.
Remember, these are just a few examples, and the possibilities are endless. Experiment with your favourite cocktails and let the clarity of your ice take your mixology skills to new heights. Cheers to the perfect blend of flavour, aesthetics, and coolness! For more inspiration like this, remember to sign up for our newsletter!


